EstateAI Merge to HDR: Bracket Size and Upload Guide
Explore EstateAI Merge to HDR with real screenshots. Learn the difference between bracket size and image count, understand Auto and 3-, 5- or 7-exposure options, and check your source files and job summary before starting a merge.
EstateAI Editorial TeamSeptember 28, 202612 min readShare
EstateAI Step by Step · Module 04: Merge to HDR · Guide 04.1
Fifteen uploaded photographs do not necessarily mean fifteen finished HDR images.
They could represent five compositions captured with three exposures each. Or three compositions captured with five exposures each.
The file count is the same. The correct grouping is not.
Before starting a merge, you need to understand which photographs belong together, how many exposures were captured for each composition, and whether the job summary matches your intended selection.
This guide explains the EstateAI Merge to HDR setup, from preparing the source files to choosing a bracket size and reviewing the resulting photographs.
The essential distinction: HDR merging combines captured exposure information. It is not the same task as generating furniture, redesigning a room or inventing a new property image.
Quick answer
EstateAI Merge to HDR is a photographic workflow for combining bracketed exposures. The interface offers Auto, 3, 5 and 7 as bracket-size options, along with photo selection and a job summary.
Prepare complete exposure sets, select the appropriate setting and compare the expected output count with the compositions you actually photographed.
Bracket size is the number of exposures in a set—not a quality preset.
Learn how to find the right property in EstateAI using workspace context, search, property status views and property cards while keeping source photos, AI outputs and real estate editing workflows organized.
Real estate marketing is changing fast. From AI virtual staging and photo enhancement to decluttering, day-to-dusk editing and renovation visualization, property professionals now have more ways to prepare listing media than ever. EstateAI brings those workflows together in one property-first workspace, helping real estate photographers, agents, brokerages, agencies, builders and developers upload, enhance, organize, review, share and deliver property media without jumping between disconnected tools.
Discover EstateAI by an AI-powered property marketing platform built for real estate photographers, agents, brokerages, media companies, and property marketing teams. Enhance listing photos, virtually stage vacant rooms, declutter spaces, visualise renovations, create Day-to-Dusk transformations, improve exteriors, and manage property media through one connected AI-powered workspace.
| Source photographs | They belong to the intended property and exposure sequence. |
| Composition | Each bracket set shows the same viewpoint. |
| Bracket size | Auto or the fixed setting is appropriate for the captured sequence. |
| Job summary | Input and expected-output information make sense together. |
| Final review | Completed images will be checked against the source photographs. |
What is HDR merging in real estate photography?
Exposure-bracketed photography captures the same composition at different exposure levels.
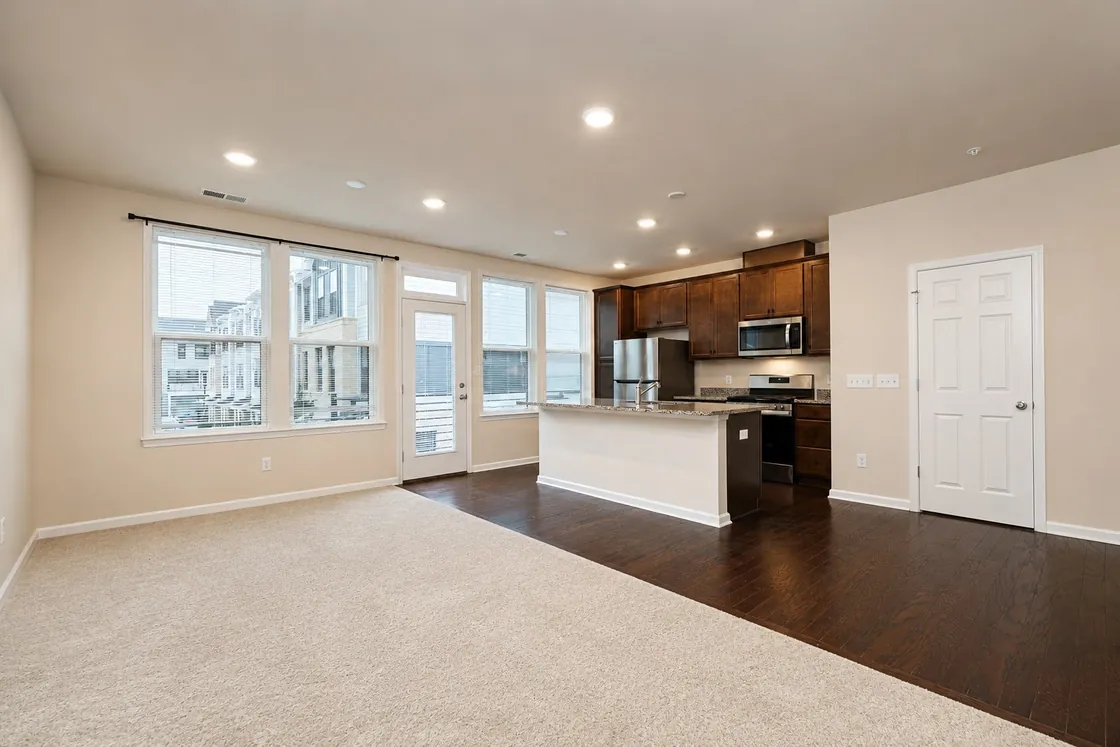
For an interior with bright windows and darker areas, the source set gives the merger different captured information to work with. The aim is a useful photographic rendering of that scene—not simply the brightest possible image.
The EstateAI interface describes its HDR workflow as developing, aligning and exposure-fusing the selected brackets without generative AI.
That is a different operation from virtual staging.
A merged image is intended to remain a photograph assembled from the captured exposure set. A staging workflow adds a proposed furnishing arrangement.
Prepare the photograph first. Decide separately whether it needs a later transformation.
1. Prepare the correct bracketed photographs
The first decision happens before uploading.
Review the source set and establish which exposures belong to each composition.
Keep the viewpoint consistent
A darker kitchen photograph and a brighter bedroom photograph are not a bracket set.
Neither are two different angles of the same living room.
For one intended merge, choose the exposures captured from the same viewpoint. When the camera moves to another composition, that should be treated as a different set.
Check completeness before processing
Look for missing exposures, unrelated images and accidental duplicate selections.
Our recommendation is to keep the intended sets clearly organised before testing a batch. Do not assume that software will always identify or repair an incorrectly assembled collection.
Also retain a separate copy of the original files.
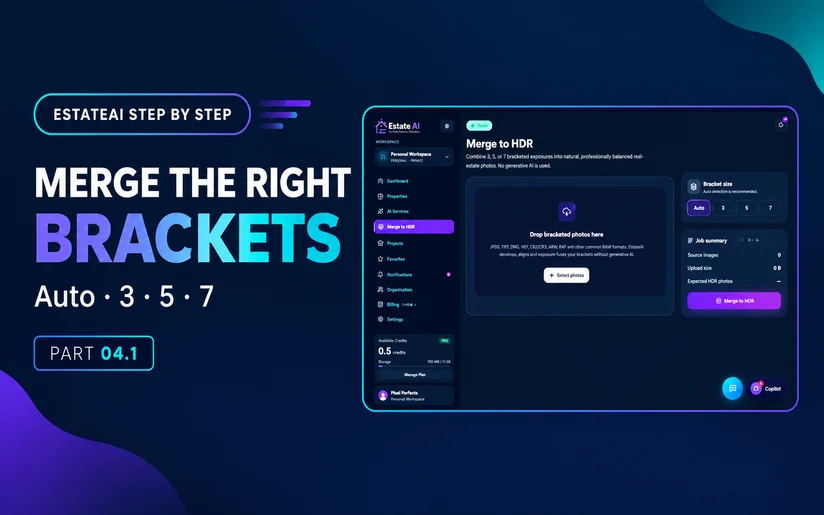
In the supplied interface, this tool has its own sidebar entry, separate from AI Services.
The upload area presents two local-file entry points:
Drop bracketed photos here
Select photos
Choose a representative complete set for your first workflow check. Starting with a known set makes it easier to compare your intended grouping with the information shown by the application.
This is a recommended verification approach, not a claim that the tool has a small-batch limit.
Which file types are listed?
The upload screen lists JPEG, TIFF, DNG, NEF, CR2/CR3, ARW and RAF, along with other common RAW formats.
These are listed input categories. They are not a guarantee that every camera-specific variant has been tested in this guide.
For a new camera or export workflow, check a representative source set before sending the entire shoot.
The available interface reference does not establish maximum upload size, maximum batch capacity or compatibility with every RAW variant.
3. Choose Auto, 3, 5 or 7
The Bracket size panel contains four choices:
| Setting | What it represents | What to check |
| :--- | :--- | :--- |
| Auto | Automatic bracket-size detection | Compare the resulting information with your known capture pattern. |
| 3 | Three exposures per intended set | Confirm that the selected compositions were captured in three-exposure sequences. |
| 5 | Five exposures per intended set | Confirm that each intended sequence actually contains five exposures. |
| 7 | Seven exposures per intended set | Use it for genuine seven-exposure sequences, not as a quality upgrade. |
The interface recommends Auto. EstateAI’s HDR documentation describes detection based on repeating exposure patterns, using metadata where available.
That does not remove the need to understand your source set.
Auto is not a substitute for checking the shoot
A file total alone can fit more than one bracket arrangement.
For example, fifteen files divide evenly into groups of three and groups of five. Only the capture sequence establishes which interpretation is correct.
When a shoot contains mixed patterns, our recommendation is to separate known, complete sets before testing rather than assuming that every mixed batch will be handled as intended.
Seven exposures are not automatically better
For an already captured shoot, choose according to the photographs you have.
Selecting 7 cannot create four additional captured exposures from a three-photo sequence.
The setting describes grouping. It does not manufacture missing source information.
4. Calculate the intended number of compositions
For a uniform collection of complete sets:
Number of compositions = source photographs ÷ exposures per composition
Use this as a preparation check—not a promise of successfully exported images.
| Known source arrangement | Source files | Exposures per composition | Intended compositions |
| :--- | ---: | ---: | ---: |
| Five three-exposure sets | 15 | 3 | 5 |
| Three five-exposure sets | 15 | 5 | 3 |
| Three seven-exposure sets | 21 | 7 | 3 |
These are arithmetic examples, not measured EstateAI results.
The first two rows explain the most important point: the same number of files can represent different numbers of compositions.
If your calculation does not match the information displayed after selection, inspect the inputs and bracket configuration before proceeding.
Do not immediately assume a processing failure or change the bracket size just to produce a preferred number.
5. Read the Job summary before submitting
The Job summary contains three fields:
| Field | What it helps you check | What it does not establish |
| :--- | :--- | :--- |
| Source images | The displayed number of input photographs | Whether every selected file belongs in the intended set. |
| Upload size | The displayed size of the selected input | A guaranteed processing duration. |
| Expected HDR photos | The expected output count when available | Successful completion or image quality. |
The supplied empty-state screen shows zero source images, zero upload size and a dash for expected HDR photos.
Those are empty-state values—not evidence of a failed job.
After making your own selection, compare the summary with the source collection you prepared.
Check identity as well as quantity
A count can be correct while the selected photographs are wrong.
For example, fifteen files could include fourteen intended exposures and one unrelated photograph. The total still looks plausible, but the collection needs correction.
Review the selected files, not only the number.
Do not interpret the credit balance as the HDR price
An account credit balance and the price of a processing action are different things.
The supplied interface does not establish a per-merge price, a free-HDR allowance or the amount deducted by an HDR job.
Check the applicable in-app terms before processing. Do not infer HDR pricing from the cost of a separate AI service.
6. Confirm the setup before pressing Merge to HDR
The Merge to HDR button is the visible submission control beneath the summary.
Before using it, confirm:
The property and source sequence are correct.
Each intended bracket set is complete.
The bracket-size choice matches your capture.
The displayed summary is reasonable for that selection.
Any applicable account terms are understood.
These checks are our recommended pre-submission routine. They are not a claim that the application performs every validation automatically.
Avoid sending an unfamiliar large batch through the workflow without first knowing how a representative set behaves.
A small successful test is useful evidence about that test. It is not a benchmark for thousands of photographs or every camera format.
7. Understand the documented processing stages
EstateAI describes four stages:
Prepare → Align → Merge → Finalise
Preparation handles the selected sources and bracket sets. Alignment brings the exposures into correspondence. Merging combines their exposure information. Finalisation produces the completed output.
The HDR product page also describes results becoming available as sets complete.
These are documented capabilities. This article does not report a measured processing time, an authenticated merge run or a tested output format.
Processing completion is a milestone—not a quality approval.
8. Review the merged photograph before using it
A non-generative merge can still need photographic correction.
Adobe’s HDR documentation discusses alignment and ghosting in exposure merging. Those concerns are relevant to reviewing HDR photographs, although Adobe’s specific controls should not be assumed to exist in EstateAI.
Use the sources to check the actual result.
| Review area | What to inspect |
| :--- | :--- |
| Fixed edges | Window frames, cabinet lines and other stationary details should not appear offset or doubled. |
| Moving subjects | Examine curtains, foliage and other objects that changed between exposures. |
| Window and interior balance | Check whether the rendering is useful without forcing every area to equal brightness. |
| Colour and contrast | Look for an unnatural cast or an exaggerated processing appearance. |
| Composition | Confirm that the result represents the intended viewpoint and source set. |
Inspect problem areas rather than only the thumbnail
A thumbnail can hide small edge inconsistencies.
Compare the output with the originals at a size that lets you examine important architectural details.
For review purposes, distinguish a problem visible in a source photograph from one appearing only after merging. That helps you decide whether to revisit the inputs, reconsider processing or request additional editing.
Our recommendation is to retain the complete bracket set until the final image has been checked.
A clean-looking preview should invite closer review—not replace it.
9. Continue into the property workflow when appropriate
EstateAI’s HDR photography guide describes moving completed HDR results into a Property without uploading the merged photographs again.
That provides a path from capture preparation to later property-media work.
Choose the next treatment according to the brief. EstateAI’s Image Enhancement and AI Virtual Staging pages describe different services: photographic enhancement and furnishing visualisation.
An acceptable HDR result does not automatically need both.
Our recommended sequence is:
Bracketed sources → HDR result → photographic review → optional treatment → final review
The intermediate review matters. Do not rely on a later transformation to conceal an unresolved issue in the merged photograph.
The exact Property-handoff controls were not demonstrated in the supplied interface reference. Follow the current application rather than an assumed button sequence.
10. Get professional editing support when the source needs it
Some photographs need more than a straightforward merge.
For a difficult file, send the complete source set and a specific brief rather than only an export labelled “please fix.”
For the development background, Dotera describes its work on the platform in the EstateAI development case study, including property records, processing history and connected versions.
The practical lesson is to preserve the relationship between the input and the result.
For your own production process, keep track of which source set produced each merged photograph and which version was eventually selected for delivery.
That is our recommended review practice, not a claim that every internal grouping record is visible in the current interface.
---
Frequently Asked Questions
1. Does EstateAI Merge to HDR use generative AI?
The interface and official documentation describe a non-generative photographic workflow using source development, grouping, alignment and exposure fusion.
Generative services such as virtual staging are separate operations. This guide reports the documented approach; it does not independently inspect the implementation.
2. Should I choose Auto, 3, 5 or 7?
Auto is the interface’s recommended detection option. A fixed setting should match the number of exposures actually captured for each composition.
Do not choose a higher number as a quality upgrade. Compare the grouping and job information with your known source sequence.
3. Can EstateAI merge JPEG, TIFF and RAW photographs?
The upload screen lists JPEG, TIFF and several RAW formats, including DNG, NEF, CR2/CR3, ARW and RAF.
Exact camera-file compatibility and upload limits were not tested for this article. Check a representative complete set when introducing a new source format.
4. How many HDR photographs will fifteen source files produce?
That depends on the actual bracket arrangement.
Fifteen files could represent five three-exposure compositions or three five-exposure compositions. Those counts assume uniform, complete sets; they do not guarantee successful processing or delivery.
5. How much does EstateAI HDR merging cost?
The interface reference used for this guide does not establish HDR-specific pricing.
Check the current in-app allowance, estimate or confirmation, and ask support when the charge is unclear. A displayed account balance is not the price of one merge.
6. Can I continue working with merged HDR photos inside EstateAI?
EstateAI documents using completed HDR results to create a Property without another upload of those merged files.
Review the photographs before applying optional services. The exact handoff and export controls were not tested for this article.
---
Final takeaway
Real estate HDR merging starts with understanding the photographs—not selecting the largest bracket number.
Prepare complete source sets. Match the exposure pattern. Inspect the job summary. Review the completed image against the sources before choosing any further treatment.
The file count is not the composition count. The bracket setting is not a quality preset. And a completed merge is not an automatic delivery approval.
Start with a known, complete exposure set in EstateAI Merge to HDR, then review the result before scaling the workflow to a larger shoot.
Product information was checked on September 28, 2026. The control descriptions also use a supplied interface reference. No authenticated upload, merge, payment or download was performed for this article. Numerical examples are explanatory arithmetic, not measured product results.
About the author
Waqas Ahmad writes for Pixel Perfects Solutions and supports its content, SEO and digital marketing work. His topics include real estate photography, AI, property-media workflows and PropTech.